How to Set Up IOS Mail
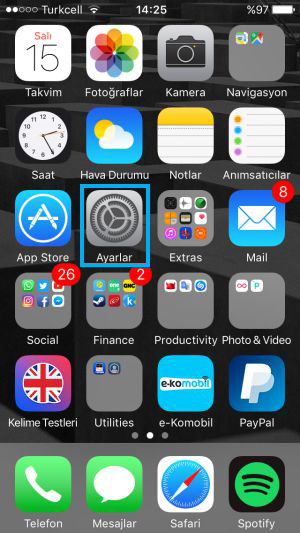
– Let’s go to the Settings section on the iPhone home screen.
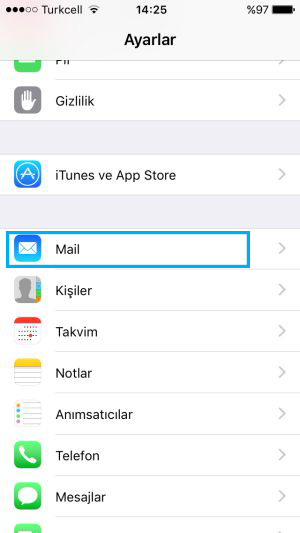
– Click on the Mail button in Settings.
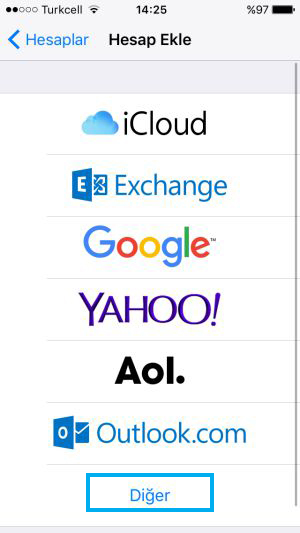
– Let’s click on the Add Account button.

– Let’s click on the Other option at the bottom.
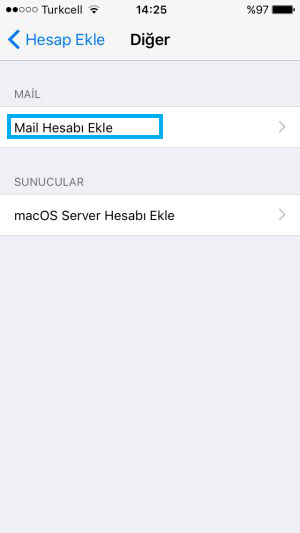
– Let’s click on the Add Mail Account button.
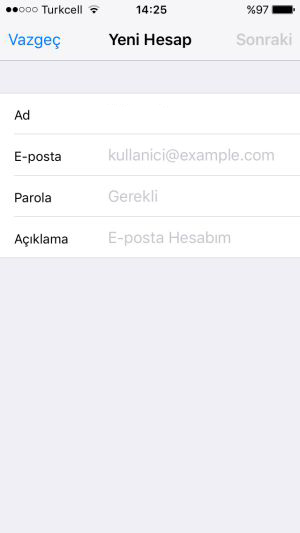
– Fill in your name, email address, password and description section with YOUR OWN INFORMATION as in the example and tap the “Next” button. (The important thing is the email address and password section. The description section is just a name to better distinguish your mailbox.)
– Select the “IMAP” button in the window that appears and fill it in as follows. (If you do not know the information, you can contact us.)
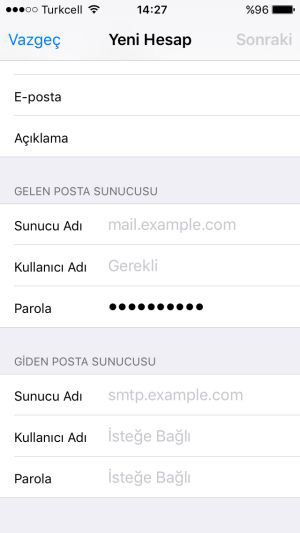
Name: Write your name
Your email address: Write your full email address.
Description: You can leave it blank.
Incoming Mail server
Server Name: Write mail.alanadaniz.com
User name: Write your full email address
Password: Write your password, paying attention to uppercase and lowercase letters
Incoming Mail Server
Server Name: Write mail.alanadaniz.com
User name: Write your full email address
Password: Write your password, paying attention to uppercase and lowercase letters
After filling in all the information, click the Next button and then the Save button.
Note: If you want, you can also choose the POP option. Your messages will be downloaded to your phone. This will cause your mail to take up more space on your phone.
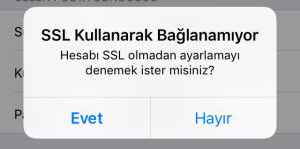
– If the message Cannot Connect Using SSL is displayed on the screen, we say Yes.
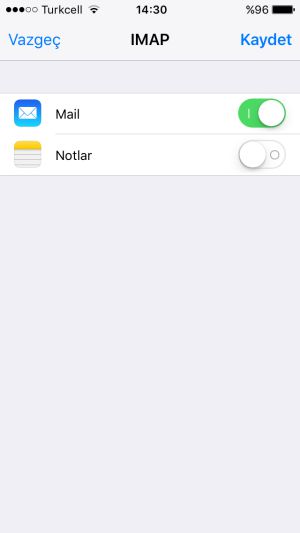
– On this screen, our e-mail account has been successfully added, but we are asked to choose what will be synchronized, for example, only e-mail is selected, if you want it to come in my notes, you can choose both. We finish the process by saying Save.
When you go back to the main screen and open our Mail application, you will see your incoming messages.


